This page provides instructions of setting up hosting with PSU. Remember, web hosting is essentially using a far-away computer to store files. This is essentially the same as hosting files on cloud services like Dropbox, only it's much more open-ended in terms of what you can upload.
You'll need to do this for Lesson 2 Exercise 2.
Apply Now
Apply for server space with PSU at this application page. It may take a day or two for your space to become active, so do this part right now even if you're not going to complete Exercise 2 immediately.
Student space will remain active during periods of continuous enrollment and for six months after graduation.
Access your space online
Once you receive an email saying that your PASS space is active, you can access an online file manager here: https://explorer.pass.psu.edu/
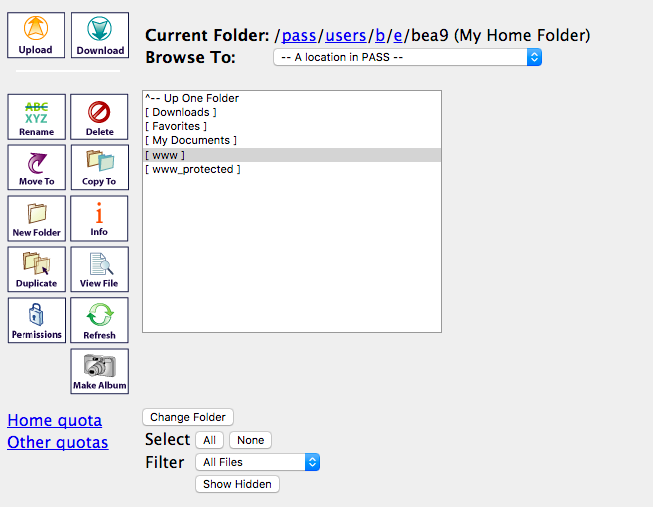
You will see a few different folders listed in the white content box. The [www] is the public location where you'll want to upload files.
Double click [www] to open that folder—there should be a default "index.html" file in there already. Web browsers automatically look for a file called "index.html" when they navigate to an online server address.
Exercise 1 will go over how to upload a new file to this location.
The public URL for your web space is: "http://personal.psu.edu/user123" — but replace "user123" with your PSU username.
If you type that into your web browser, you'll be looking at the "index.html" file as rendered by your web browser.
FTP Software
You can also use a standalone application to manage your web hosting. This is usually easier than using the interface provided in your web browser. There are many different File-Transfer-Protocol apps; some of the more popular ones are:
Filezilla (Mac/Win, free)
Cyberduck (Mac/Win, free)
Transmit(Mac, paid)
We'll use Filezilla for the demo in Exercise 1 since it's open-source and easy to get started with.