Students will use their research blogs throughout the course, but for this exercise we're just interested in creating the blogs through PSU Sites.
Exercise 1:
- Create a website with PSU Sites
- Add an About Page
- Write a short blog post
Creating a Site

- Go to sites.psu.edu and click the big "Create a site" button on the homepage.
- Login with your PSU credentials.
- Fill out the following fields:
- Site Address refers to the URL for your site; whatever you enter will result in a URL like "[[[http://sites.psu.edu/myawesomesite"](http://sites.psu.edu/myawesomesite")](http://sites.psu.edu/myawesomesite"](http://sites.psu.edu/myawesomesite"))](http://sites.psu.edu/myawesomesite"](http://sites.psu.edu/myawesomesite")](http://sites.psu.edu/myawesomesite"](http://sites.psu.edu/myawesomesite")))\). Only lowercase letters and numbers are allowed.
- Site Title is the general name for your site; you probably want to enter the same thing you used for the Site Address, but you can call it whatever you want (and you can change it later).
- Privacy will determine if your site is promoted to search engine and public web listings (this can also be changed later). Choose whatever you like.
The Interface
You should have received a confirmation screen with links to the site itself and the administration backend. If not, you can always just type your URL into your web browser (e.g. "[[[http://sites.psu.edu/myawesomesite"](http://sites.psu.edu/myawesomesite")](http://sites.psu.edu/myawesomesite"](http://sites.psu.edu/myawesomesite"))](http://sites.psu.edu/myawesomesite"](http://sites.psu.edu/myawesomesite")](http://sites.psu.edu/myawesomesite"](http://sites.psu.edu/myawesomesite")))\).
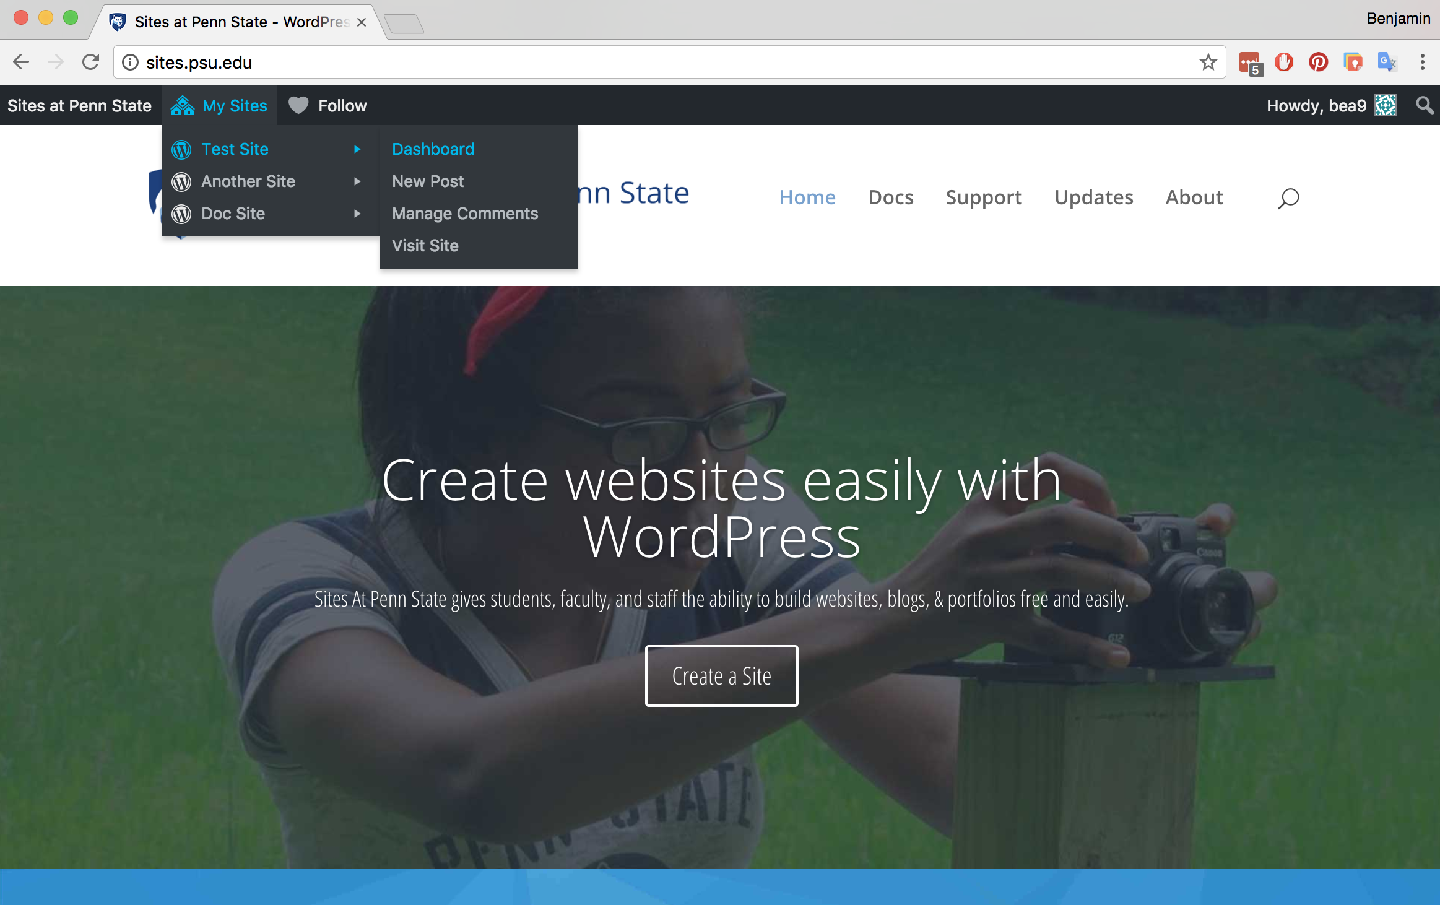
While logged in, you should see a navigation menu at the top of the screen with a dropdown called "My Sites" — you can even have multiple sites. Select your site and click "Dashboard" to access the backend of your site.
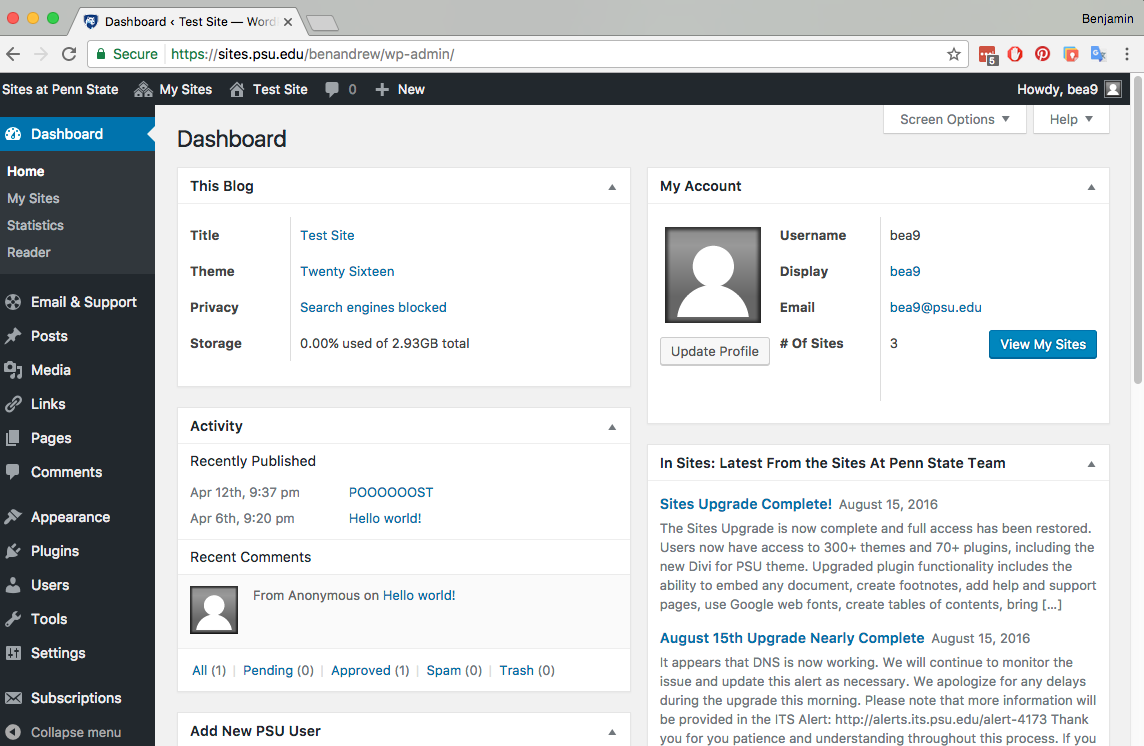
The Dashboard provides and overview of recent activity on your site, but it's really just one of several sections in the Wordpress backend, and we're more interested in all those other sections listed in the lefthand sidebar.
_PRO TIP: _Applications like Wordpress, Photoshop, or Microsoft Office use a lot of the same design terms (e.g. "sidebars") and visual conventions of websites. Always pay attention to how information is presented to you and file that knowledge away for your own projects.
The sections are fairly self-explanatory, but some of important things to note right away:
- The house icon in the top navigation menu will take you to the live website.
- Settings controls top-level features like the name of your site, time and dates, and how Wordpress itself functions.
- Appearance lets you control the visual look of your site. We'll be using this right away.
- Posts and Pages are the two default types on content that you can create. Don't worry too much about these yet.
- Posts act like blog posts and by default will appear in a big endless stream with the title, date, and author included for each one.
- Pages are top-level sections for your site; they will automatically appear in the navigation menu. These are typically used for things like an "About" page, "Contact" page, etc.
- Plugins lets you add some additional features. You can normally choose from thousands of user-created plugins, but we're limited to ones that have been approved by PSU.
- Users allows you to invite and manage other accounts. If you ever want to work with a team of people, they could all log in and edit a website.
Choose a Theme
Select "Appearance" from the sidebar and then choose "Themes."
There are several hundred themes available to choose from, and each one will change the visual appearance of your site without altering the content (e.g. posts, pages, text, images, etc.) — and you can change your theme whenever you want.

The active theme (Twenty Sixteen by default) should be highlighted, and to activate a different theme just hover over it and click "Activate." You can also see a "Live Preview" of a theme, but since we're only sharing these blogs with the class there's not a big risk in changing themes at will. For a professional website, you would want to do lots of testing before launching a new theme.
Each theme will have slightly different options for what you can customize. For example, some themes might include an option to set a custom header image at the top of the site, while others might only display the name of the site and the description (set these under Settings >>> General).
Further customizations is available under Appearance >>> Customize.

The Customize screen offers a new sidebar with settings related to the visual appearance of your site. This is a quick way to choose unique colors for text, set any background images, and other site-wide styles. To exit this screen click the X in the top-left corner. Also note the buttons at the bottom of the sidebar that allow you to preview the site on different screen sizes (e.g. mobile, tablet, desktop). We'll talk a lot more about working with different screen sizes throughout the course.
Adding Content
Once you've chosen a theme, you should add some quick content just to get a feel for the process.
In the Wordpress backend, select "Pages" from the sidebar and "Add New" to create a new page.

Name the page "About" and write 1-2 paragraphs about yourself. You can re-use any text from your self-portrait site, or write something new. This is just to remind people who you are when we're reading each other's blogs in the future.
The main section of the "Add New Page" screen is the Editing Area, which provides some familiar text formatting tools like bold, italic, lists, etc. You can also insert images and embed videos here, which we'll discuss later.
Publish the page with the big blue button on the right; note that you can also "Save Draft" to save your content without publishing it, or "Preview" how it will look on the website.

Wordpress is designed around modular sections, some of which can reoccur on every part of the website, this allows you to add content (e.g. a Post) without having to include things like the header and menu every time. Not pictured above is the Footer, which is at the bottom of every page by default.
Menus
Once you add your About page, it may or may not appear in the primary navigation menu on your site. In fact some themes might not even have a menu by default. Here's how to add one:
- Select Appearance >>> Menus
- Create a new Menu and give it a name.
- All your published pages will appear on the left, but you'll have to select each one and click "Add to Menu."
- Once you've create the menu, you need to tell Wordpress where to display it—check the box called "Primary Menu" to display it at the top of all pages.
- Check "Automatically add new top-level pages to this menu" to avoid having to do this the next time you create a new page.
On this screen you can rearrange the pages within the menu by dragging them, or add sub-menus by dragging a page slightly to the right so it appears indented. For example:
- About
- Resources
- Interviews
- Maps
- Contact
Posts
Posts are very similar to Pages; you can select "Add New" and compose content in the same kind of interface used for editing pages. There's also an "All Pages" screen you can use to modify or delete existing Posts.
Edit or delete the "Hello World!" Post that is generated automatically, and create a new Post to make sure you can successfully publish blog posts.
Answer any of the following questions for your first blog post (it can be brief):
- What do you think about blogging?
- Is it still essential to online culture?
- What's the difference between blogging and other forms of online publishing?
- Have you done any blogging prior to this class?
Publish your Post. If you just edited the default Post, make sure you change the title.
By default Posts are displayed on the homepage of your site. It's possible set up a different page to display blog posts, and have a static homepage. If you want, you can make those changes under Settings >>> Reading
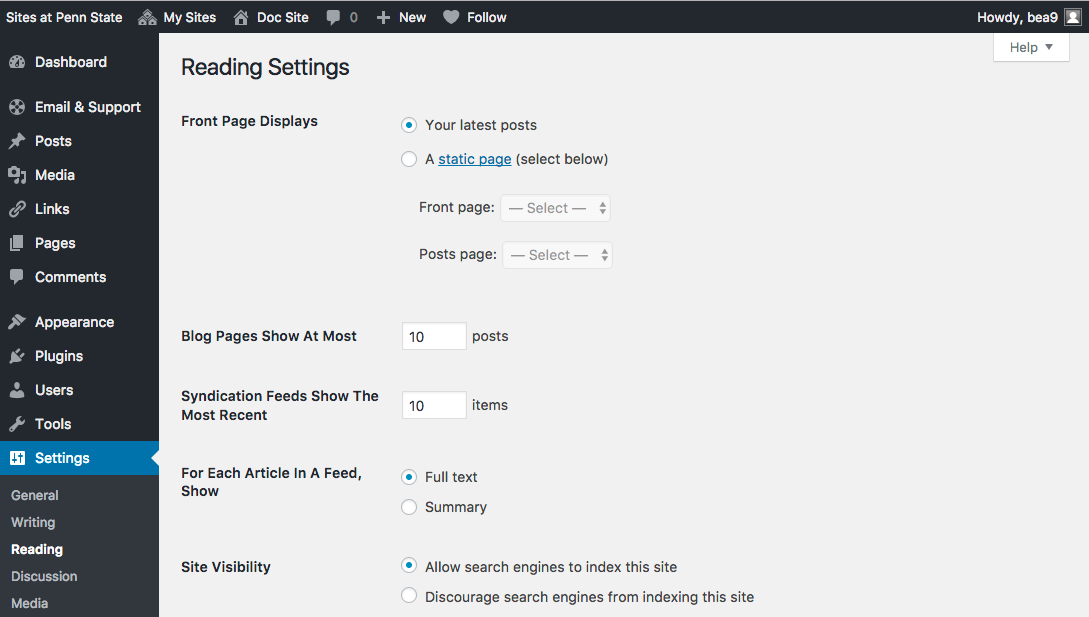
By default the homepage displays "Your latest posts" but you can change it to a "static page" if you want. You can choose from any of your published pages—and then you'll have to set a different page to display your Posts (e.g. a page called "Blog").